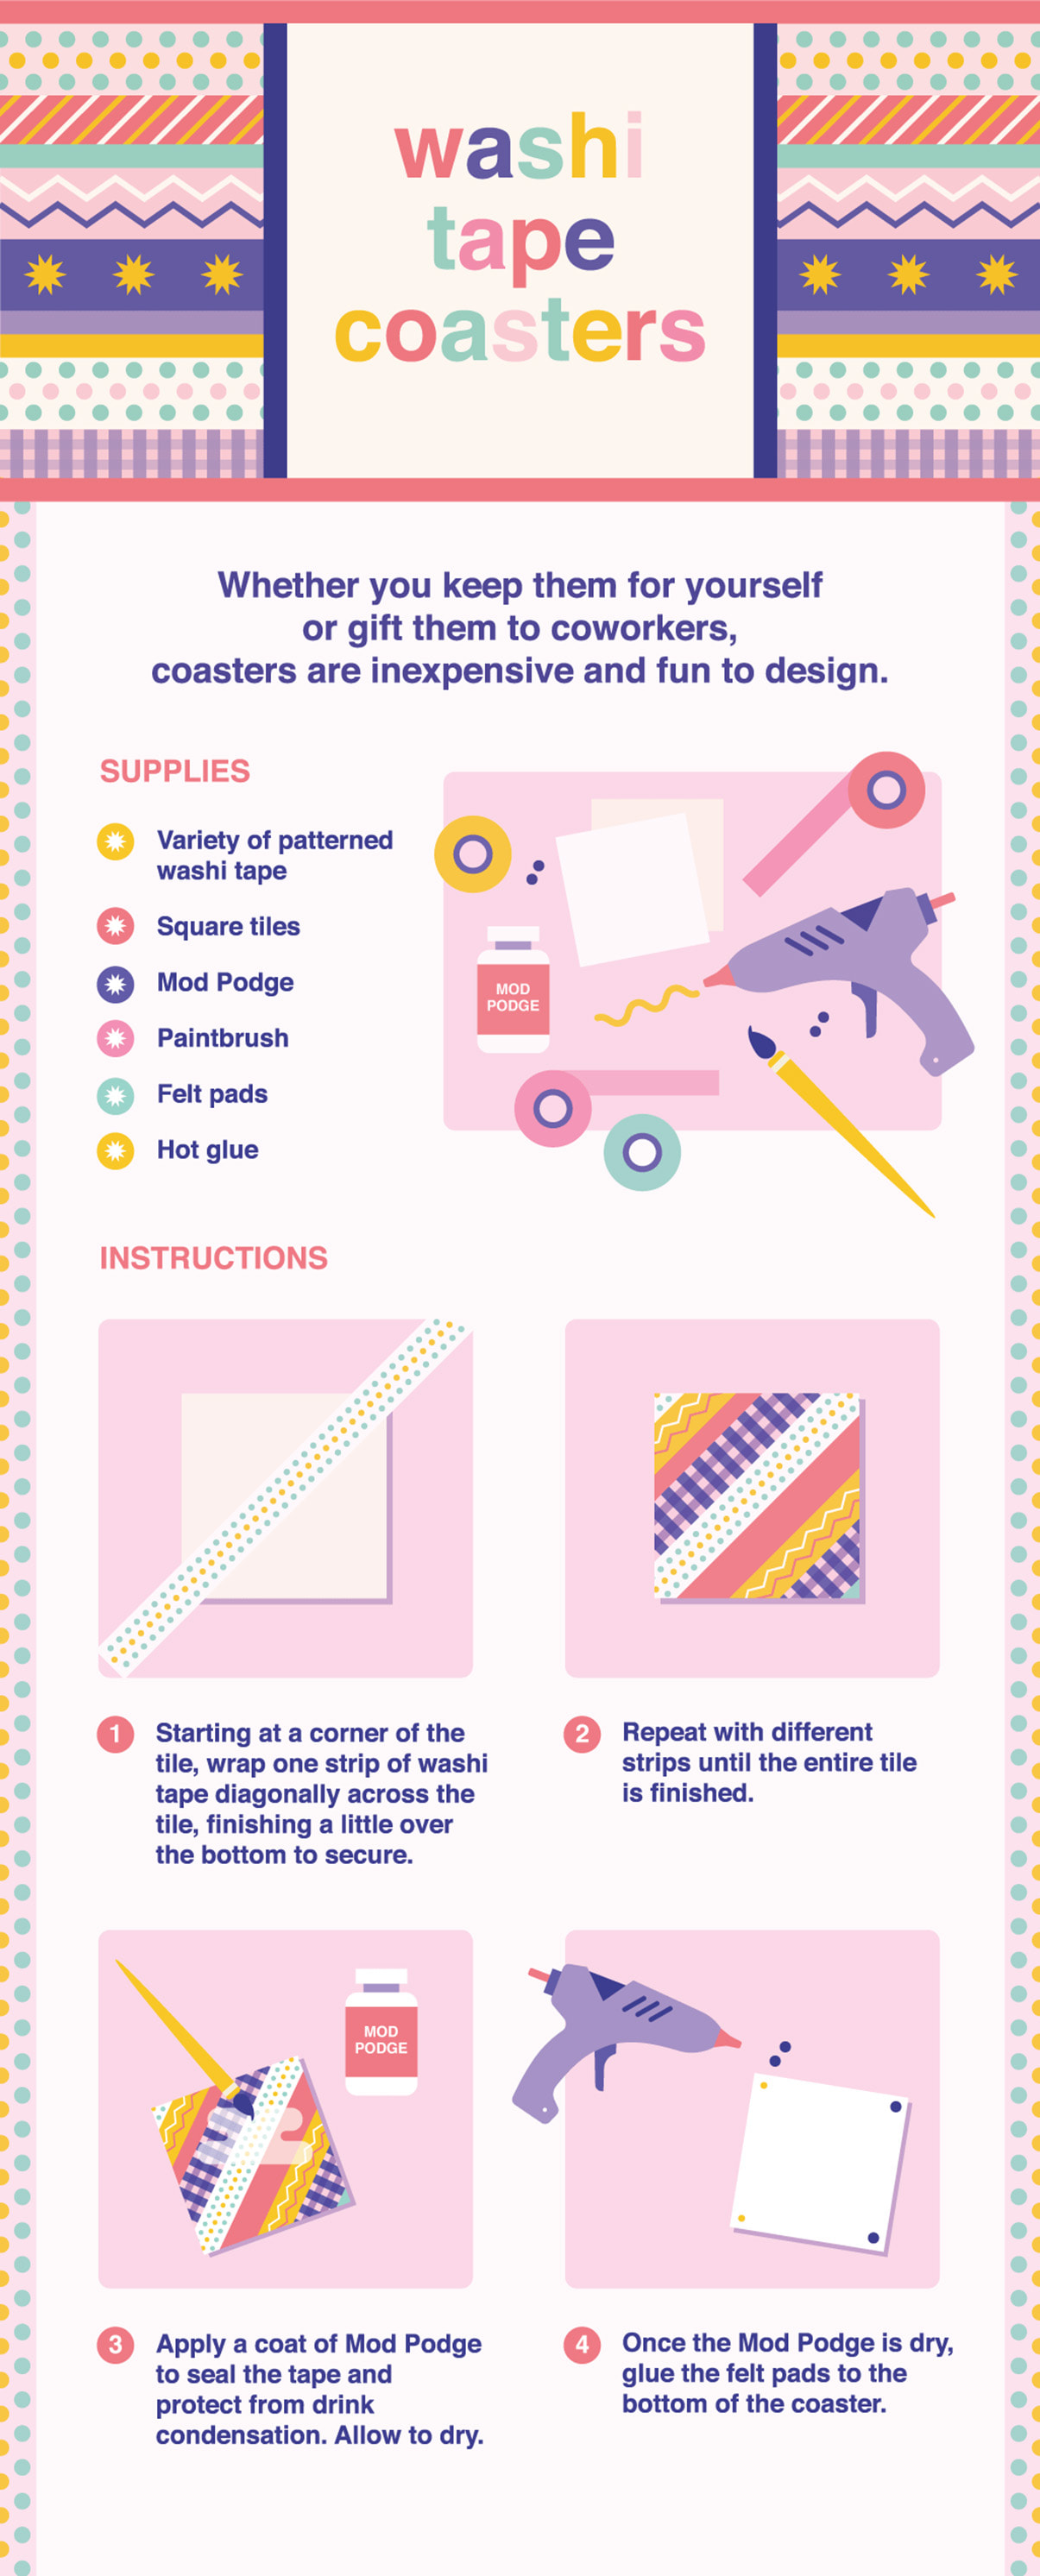
Spending the majority of the day stuck in a cubicle can be dull—especially if the workspace is mundane. While decorations won't drastically change your workday, they can warm up a space and make the hours a little brighter. Washi tape, a Japanese decorative tape made from natural fibers, is an inexpensive and easy-to-use material that can transform everything from laptops to pencil holders.
The tape comes in a wide variety of designs and patterns and is durable enough to stick to almost anything. Since it's not as sticky as masking tape it won't leave behind a residue, and it's easy to change up when you're ready for a new design. Read on for novel ways to decorate your workspace with washi tape.
Add Personality to IT Equipment
Laptops, keyboards, and cords are a mainstay in almost every cubicle, but they don't have to be a total eyesore.
Laptops: Prevent others from accidently taking your laptop by creating a personalized cover. Choose different colors or patterns of washi tape to line the cover. Before applying, carefully clean the surface with a small amount of rubbing alcohol. Once dry, roll the tape across the cover, starting at the top and pressing down as you go. Continue with different patterns, working your way to the bottom of the cover.
Keyboards: Know your keyboard by heart? Decorate the keys with individual squares of washi tape. First turn off your computer and wipe down the keys with a little rubbing alcohol. Place a piece of scrap paper on one key and trace the outline with a pencil; this is your template for all the square keys. Place the washi tape on the template, cut around to form the square, and press the tape onto the keys, ensuring no edges hang off. Create templates from the scrap paper for rectangular keys and repeat the same process.
Mousepad: While you're decorating your keyboard, why not upgrade your mousepad to match? Run a large strip that coordinates with the keyboard design across a plain mousepad and voila!
Cords: To distinguish between different cords, wrap each with a small amount of different patterned washi tape. To make things even clearer, use a permanent marker to label the tape flags. Washi tape can also decorate charger plugs (a good idea if you share outlets or power strips with other coworkers).
Decorate Organizational Tools
Decorate files, notebooks, and clipboards to identify different categories or projects.
Files: Only have one color of hanging folders? Add a strip of washi tape to the top of each. Since only the top can be seen in a filing cabinet, the different colors and patterns can help you keep files even more organized.
Notebooks: Place strips of washi tape across notebook covers to distinguish them for different projects (or just to make them look a little nicer). Whether you choose diagonal or straight strips, wrap the tape around the back and secure inside the cover.
Clipboards: Transform boring clipboards into pieces of art with different patterns and sizes of washi tape. If you want to get extra creative, you can design a clipboard installation by hanging your functional artwork on the wall. Start with the centerpiece of the design (a wide tape works best) and then add different, smaller strips of tape in different angles until you have your desired look.
Pencil Holder: To add color, cover a pencil holder or mason jar in washi tape. Either design the entire surface or add a few strips around the middle.
Personal Items
Personalize other items on your desk—including lamps, coasters, and picture frames—with washi tape.
Lamps: Dress up basic lampshades by adding horizontal stripes of washi tape. Use scrap tape between stripes to maintain consistent spacing and straight lines. (The washi tape is easily adjustable, so don't worry if you don't lay the stripes straight at first.)
Vases: If you rely on empty water bottles when a surprise bouquet is delivered, you can jazz up makeshift vases (or the real deal) with washi tape. Wrap the tape around the top, bottom, or middle. Just avoid any curvy parts, which can wrinkle the tape.
Picture Frames: Upgrade boring frames by taping on strips of different patterns or colors. White frames work best since they provide a clean background if the tape is thin. Carefully trim the edges of the tape with scissors and seal with a layer of Mod Podge.

Get code to share this infographic on your site
Share this infographic on your site
Danielle Emig
Danielle Emig is a freelance writer living in New York City. Originally from Portland, she moved to the big city with only a suitcase full of shoes and a mind bursting with dreams. It was her desire for adventure that led her to NYC, and even working unpaid internships and odd jobs to make ends meet—like cocktail waitressing at a pirate-themed bar—wouldn't deter her from making it as a writer and editor. Two years later, she landed at InStyle Magazine and hasn't looked back since.


