Step 1
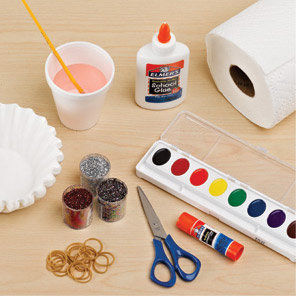
Gather supplies and put on your smock.
Step 2
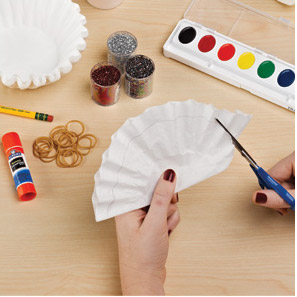
Fold a single coffee filter in half like a taco. Stating at the fold, use a #2 pencil draw a ½ of heart shape (any size will work). With scissors, cut along pencil mark. Unfold the filter.
Step 3
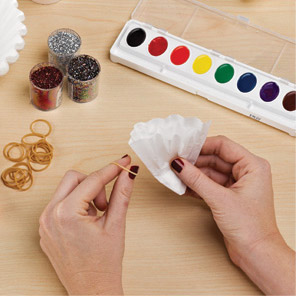
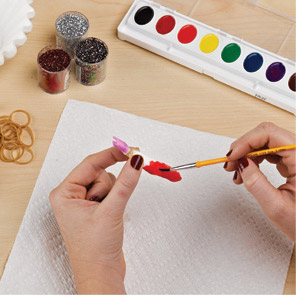
Find center of your heart, fold and gather together. Tightly twist a rubber band around the gathered end (similar to a tie dye technique).
Step 4
Now it's time to start painting your heart. It's a good idea to place paper towel under your work space to help reduce the mess of workng with water colors. While painting, make sure the water colors are saturating into coffee filter for the best results. Remember water colors blend together, so you will discover some unique and beautiful patterns.
Step 5
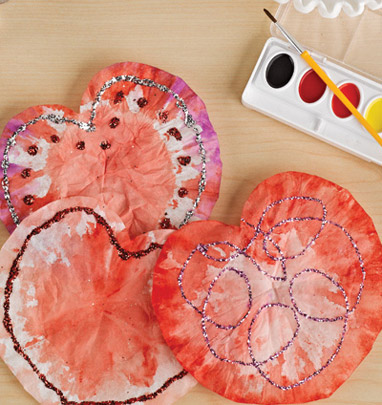
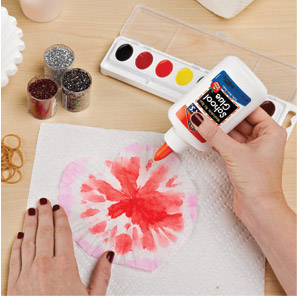
When you are finished painting, carefully remove the rubber band. Slowly unfold the cofee filter so it does not rip. Younger students may need the help of a teacher to help them with this part. Lay your coffee filter flat on drying rack until completely dry, then decorate as you'd like. Draw shapes and patterns with glue and sprinkle on glitter, and shake off access in a paper towel. Lay flat to and enjoy!
Hints & Tips
For this project, markers make a great alternative to water colors. Simply color on the coffee filter and spray with water or vinegar and watch the color spread
Twist multiple rubber bands to your coffee filter for an even greater tie dye effect.
Try using glitter glue, stickers, feathers and pom pons to decorate your coffee filter.
Use a paper punch to make holes in your heart and string the filters on a piece of string or ribbon to make garland.
In order to tell which heart belongs to which student, write their names on individual sticky notes to place next to the hearts while they are drying.
Glue a small photo of each student in the center of the heart they create for them to give as a Valentine's Day gift for family or friend.
Be sure to post your art projects on our Facebook page! Facebook.com/Quill
